
How To Replace a Camshaft Cap
Camshaft caps play a vital role in the efficient functioning of an internal combustion engine. Whether you’re a DIY enthusiast or a seasoned mechanic, understanding how to replace a camshaft cap is essential when addressing engine repairs. This comprehensive guide provides insights into the process, potential costs, and common questions to ensure a smooth replacement experience.
What Is a Camshaft Cap?
A camshaft cap is a critical component of an engine’s valvetrain. These caps secure the camshaft in place within the cylinder head, ensuring it rotates smoothly and aligns perfectly with the engine’s timing system.
Key Functions of a Camshaft Cap:
- Support: Keeps the camshaft aligned and stable during operation.
- Lubrication Management: Helps maintain proper oil flow around the camshaft to prevent wear.
- Minimized Friction: Prevents metal-on-metal contact by ensuring adequate clearance.
Why You May Need to Replace Camshaft Caps
Camshaft caps are designed to last as long as the engine, but certain situations or conditions may require their replacement. Here’s why replacing camshaft caps might be necessary:
1. Engine Rebuild or Overhaul
- During a full engine rebuild, it’s common to inspect and replace worn or damaged components, including camshaft caps. Installing new caps ensures proper alignment and optimal performance for the rebuilt engine.
2. Improper Installation
- If camshaft caps were previously installed incorrectly—such as being overtightened or misaligned—they could cause uneven pressure on the camshaft. This can lead to premature wear, and replacing them becomes essential to restore proper function.
3. Wear and Tear
- Over time, camshaft caps can experience wear due to inadequate lubrication, debris in the oil, or high engine mileage. This wear can affect how the camshaft rotates, reducing efficiency and potentially causing damage.
4. Damage from Overheating
- Overheating can warp or crack the camshaft caps. This often happens when an engine overheats severely or is subjected to excessive stress, making replacement the only option.
5. Oil Flow Issues
- Camshaft caps play a role in ensuring proper oil flow to the camshaft journals. If the caps are damaged or worn, oil flow can be disrupted, leading to increased friction, overheating, and potential engine failure.
6. Engine Modifications
- When upgrading or modifying an engine for performance, new camshaft caps may be required to accommodate changes in the camshaft or cylinder head. This ensures compatibility and maintains reliability under increased performance demands.
7. Accidental Damage
- During maintenance or repairs, camshaft caps can be dropped, bent, or otherwise damaged. Even minor damage can compromise their function, making replacement necessary.
8. Visible Defects
- If the camshaft caps show signs of cracking, scoring, or uneven wear during inspection, they should be replaced immediately to prevent further damage to the engine.
Signs of a Faulty Camshaft Cap
A faulty camshaft cap can cause various issues that affect engine performance and reliability. Recognizing these signs early can prevent further damage. Below are the most common symptoms of a problematic camshaft cap:
1. Unusual Engine Noises
- A loose or damaged camshaft cap can cause the camshaft to shift or vibrate, leading to abnormal sounds like ticking, tapping, or knocking coming from the engine.
2. Oil Leaks Around the Cylinder Head
- Camshaft caps play a role in maintaining proper oil flow and sealing. A damaged or misaligned cap can disrupt this, resulting in oil leaks visible around the valve cover or cylinder head area.
3. Poor Engine Performance
- If the camshaft is not properly secured due to a faulty cap, it can throw off the engine timing. This can cause issues such as reduced power, poor acceleration, or rough idling.
4. Increased Engine Friction
- A worn or damaged cap may reduce the clearance necessary for the camshaft to rotate smoothly. This can lead to increased friction, overheating, and accelerated wear on the camshaft and other components.
5. Check Engine Light
- Modern vehicles use sensors to monitor the camshaft’s position and performance. A misaligned camshaft caused by a faulty cap may trigger the check engine light, accompanied by error codes related to camshaft position or timing.
6. Engine Misfires
- Improper camshaft alignment can disrupt valve timing, leading to incomplete combustion or misfires. You may notice hesitation or a lack of smoothness when driving.
7. Excessive Wear on the Camshaft or Journals
- A faulty camshaft cap can result in uneven pressure on the camshaft, causing visible wear marks or scoring on the camshaft journals. This is often accompanied by reduced engine efficiency.
Step-by-Step Guide to Replacing a Camshaft Cap
Replacing a camshaft cap requires precision and attention to detail. Follow these steps to complete the process effectively:
Tools and Materials:
- Torque wrench
- Socket set and ratchet
- Screwdrivers
- Engine assembly lube
- Clean rags
- Replacement camshaft caps (manufacturer-specific)
- Thread locker (if specified by the manufacturer)
Step 1: Preparation
- Safety First: Disconnect the negative terminal of the battery to prevent accidental starts.
- Gather Tools: Ensure all necessary tools and parts are within reach.
- Reference Manual: Refer to your vehicle’s service manual for torque specifications and cap alignment instructions.
Step 2: Access the Cylinder Head
- Remove Components: Detach the valve cover and any accessories obstructing access to the camshaft.
- Inspect the Camshaft: Check for damage or excessive wear that might require additional repairs.
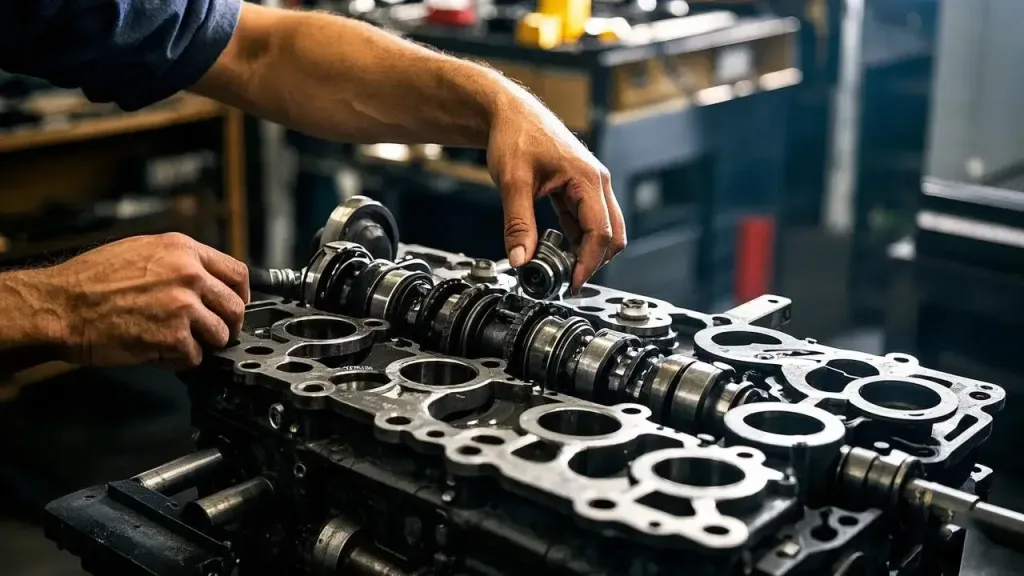
Step 3: Remove the Faulty Camshaft Cap
- Loosen Bolts: Gradually loosen the camshaft cap bolts in a crisscross pattern to avoid stress on the cylinder head.
- Clean Surfaces: Use a clean rag to remove any debris or old lubricant from the cap and camshaft journal.
Step 4: Install the New Camshaft Cap
- Apply Lubrication: Coat the camshaft journal with assembly lube for smooth operation.
- Position the Cap: Align the new cap according to the markings (e.g., “IN” for intake or “EX” for exhaust).
- Tighten Bolts: Use a torque wrench to tighten the bolts to the specified torque values in a gradual sequence.
Step 5: Reassemble and Test
- Reinstall Components: Replace the valve cover and any removed parts.
- Reconnect the Battery: Restore the negative terminal connection.
- Test the Engine: Start the engine and check for proper operation. Listen for unusual noises or inspect for leaks.
Tips for Maintaining Camshaft Caps
Proper maintenance of camshaft caps can extend their lifespan and prevent costly repairs. Here are some practical tips to ensure your camshaft caps remain in excellent condition:
1. Regular Oil Changes
- Camshaft caps rely on proper lubrication to function correctly. Old or contaminated oil can lead to increased wear on the camshaft and its caps.
- Follow your vehicle manufacturer’s recommended oil change intervals and use the correct oil grade specified for your engine.
2. Inspect for Wear and Damage
- During routine maintenance, inspect the camshaft caps for visible signs of wear, cracks, or scoring. Early detection of damage can save you from bigger issues later.
- Check for proper alignment and ensure that the caps are securely fastened.
3. Use High-Quality Oil and Filters
- Invest in high-quality motor oil and oil filters to keep the engine and camshaft assembly clean and well-lubricated.
- Inferior oil or filters may not provide adequate protection, leading to premature wear on the camshaft and caps.
4. Avoid Over-Tightening Bolts
- When working on the camshaft caps, always use a torque wrench and adhere to the manufacturer’s recommended torque specifications. Over-tightening bolts can cause the caps to crack or distort.
5. Ensure Proper Engine Cooling
- Overheating can damage engine components, including the camshaft caps. Regularly check your engine’s cooling system, including the radiator, thermostat, and coolant levels, to avoid overheating issues.
6. Maintain Proper Oil Pressure
- Insufficient oil pressure can lead to inadequate lubrication, causing excessive friction and wear on the camshaft caps.
- Monitor your vehicle’s oil pressure gauge and address any irregularities immediately.
7. Clean Engine Components During Repairs
- When working on the camshaft caps or performing engine repairs, ensure that all components are clean and free of debris. Dirt or grit can cause unnecessary wear and tear on the caps and camshaft.
8. Follow Proper Installation Procedures
- If you replace or reinstall camshaft caps, follow the correct installation steps. Improper installation can result in misalignment or uneven pressure, leading to premature failure.
9. Address Engine Noises Promptly
- Unusual ticking or knocking sounds from the engine could indicate problems with the camshaft or its caps. Investigate and resolve such noises immediately to prevent further damage.
10. Keep Up with Scheduled Engine Maintenance
- Adhering to your vehicle’s scheduled maintenance plan can help you identify potential issues with the camshaft and its caps before they escalate.
How Much Does a Camshaft Cap Replacement Cost?
The cost of replacing a camshaft cap can vary depending on the vehicle make and model, labor rates, and the extent of damage. Here’s an overview:
- Parts: $50–$150 (for a set of camshaft caps)
- Labor: $200–$500 (depending on the complexity of the engine)
DIY vs. Professional Repair
- DIY: Saves on labor costs but requires technical knowledge and tools.
- Professional: Ensures proper installation and reduces the risk of further damage.
FAQs About Camshaft Cap Replacement
Q1: Can I reuse old camshaft caps?
A: Reusing camshaft caps is not recommended unless they are in excellent condition and free of wear. Always inspect them for damage before considering reuse.
Q2: What happens if a camshaft cap is overtightened?
A: Overtightening can warp the cap or damage the cylinder head, leading to improper alignment and increased wear.
Q3: How do I identify the correct camshaft cap for my engine?
A: Check the markings on the caps and refer to the service manual for identification.
Q4: Can I drive with a damaged camshaft cap?
A: Driving with a faulty camshaft cap can cause significant engine damage and should be avoided.
Q5: Are camshaft caps interchangeable between engines?
A: Camshaft caps are typically specific to the engine they were manufactured for and should not be swapped between different engines.
Conclusion
Replacing a camshaft cap may seem daunting, but with the right tools, knowledge, and patience, it is a manageable task. Always follow manufacturer guidelines and prioritize precision during installation. Whether you’re a DIY enthusiast or prefer professional assistance, addressing camshaft cap issues promptly ensures your engine continues running smoothly and efficiently.


Add comment