
When Should You Check Your Engine’s Oil Levels?
When was the last time you checked your car’s engine oil? If you’re struggling to remember, you’re not alone. Many car owners overlook this vital maintenance task until it’s too late. Engine oil is often referred to as the lifeblood of your vehicle, ensuring the engine runs smoothly and efficiently. Neglecting your oil levels can lead to severe engine damage and costly repairs.
In this comprehensive guide, we’ll discuss everything you need to know about checking your engine oil levels, including where, when, and how to do it. We’ll also explore why regular oil checks are essential and what to do if your oil levels are off. Let’s dive in.
Where Should You Check Your Engine’s Oil Level?
Checking your engine oil level requires more than just popping the hood. It’s crucial to ensure the environment is safe and conducive to accurate readings.
Ideal Locations for Checking Oil
- Flat Surface: Always park your vehicle on a level surface. Uneven ground can lead to incorrect dipstick readings, giving you false information about your oil level.
- Well-Lit Area: A well-lit location ensures you can clearly see the dipstick markings and oil color.
- Avoid High-Traffic Zones: Safety first! Choose a place away from busy roads to avoid potential hazards.
Optimal Conditions for Checking Oil
- Engine Temperature: Ideally, check the oil when the engine is cool or has been turned off for a few minutes. A warm engine allows the oil to settle, providing a more accurate reading.
- Clean Environment: Dust and debris can contaminate your oil or the dipstick, so make sure the area is clean.
Why Checking Your Oil Regularly Is Necessary
Many car owners underestimate the importance of regular oil checks, but this small task can save you thousands in repair costs.
Prevents Engine Damage
Oil lubricates your engine’s moving parts, reducing friction and preventing wear and tear. Insufficient oil levels can cause these components to overheat and seize up, leading to catastrophic engine failure.
Improves Fuel Efficiency
Did you know that low oil levels can make your engine work harder? This increases fuel consumption, costing you more at the pump. Regular oil checks help maintain optimal efficiency.
Prolongs Vehicle Lifespan
A well-lubricated engine experiences less strain, ensuring your car runs smoothly for years to come. Regular oil checks are a small investment in the longevity of your vehicle.
What Should Your Engine Oil Level Be?
Knowing the correct oil level for your car is essential to keep it running smoothly.
Understanding the Dipstick
Most vehicles have a dipstick with two markers:
- Low Mark: Indicates the minimum oil level required.
- Full Mark: Indicates the maximum safe oil level.
Your oil should fall between these two markers. If it’s below the low mark, top it up immediately.
Signs of Incorrect Oil Levels
- Overfilled Oil: Too much oil can cause frothing, reducing lubrication and leading to engine damage.
- Low Oil: Insufficient oil can lead to overheating and increased friction between engine components.
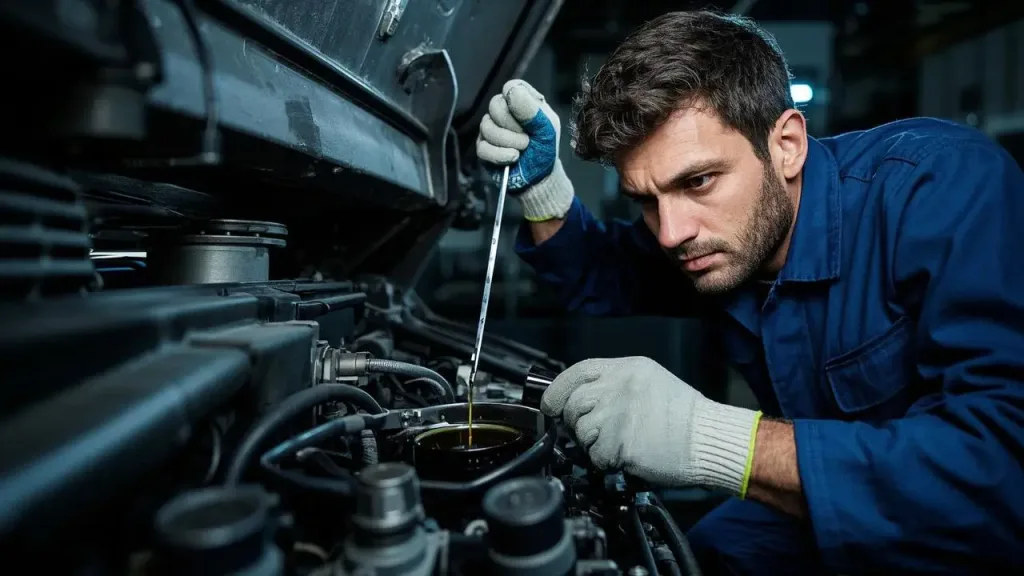
How To Check Your Engine’s Oil Level?

Checking your engine’s oil level is a straightforward process that every vehicle owner should know. It’s a quick task, but doing it correctly ensures your engine is well-lubricated and operating efficiently. Follow these simple steps to check your oil level like a pro:
Step 1: Park Your Car on a Flat Surface
Start by parking your car on a level surface. This ensures the oil in the engine settles evenly, giving you an accurate reading. Avoid checking your oil on an incline or uneven ground, as it may result in misleading measurements.
Step 2: Turn Off the Engine and Let It Cool
For the most accurate results, check the oil when the engine is cool. If you’ve just driven the car, wait about 5-10 minutes to allow the oil to settle back into the oil pan. Checking hot oil can not only lead to inaccurate readings but also pose a safety risk.
Step 3: Locate the Dipstick
Open the hood of your car and locate the dipstick. The dipstick usually has a brightly colored handle (commonly yellow or orange) for easy identification. If you’re unsure, consult your vehicle’s owner’s manual.
Step 4: Pull Out the Dipstick
Pull the dipstick out completely and wipe it clean using a lint-free cloth or paper towel. This removes any oil residue, allowing for a fresh reading.
Step 5: Reinsert and Remove the Dipstick
Insert the dipstick fully back into its tube, ensuring it goes all the way in. Then, pull it out again carefully. Look at the markings on the dipstick to see where the oil level falls.
Step 6: Check the Oil Level
The dipstick will have two markings, typically labeled “Low” and “Full” (or “Min” and “Max”). The oil level should fall between these two markers.
- If the oil is at or below the “Low” mark: You need to add oil.
- If the oil is near or at the “Full” mark: Your oil level is fine.
Step 7: Check the Oil’s Appearance
Take a closer look at the oil’s color and consistency. Fresh oil is usually light amber and clear. If the oil appears dark, gritty, or has a burnt smell, it may be time for an oil change.
Step 8: Add Oil If Needed
If the oil level is low, add oil gradually. Use a funnel to pour the correct type of oil (as specified in your owner’s manual) into the oil filler cap. After adding a small amount, recheck the oil level with the dipstick to avoid overfilling.
Step 9: Secure Everything
Once you’ve finished checking and/or adding oil, securely place the dipstick back into its tube and ensure the oil filler cap is tightly closed. Close the hood, and you’re good to go!
Pro Tips for Accurate Oil Checks
- Check Oil Regularly: Make it a habit to check your oil once a month, especially if you drive frequently.
- Check Before Long Trips: Always check your oil level before embarking on a road trip to prevent issues while on the road.
- Use the Right Oil: Refer to your car’s manual to ensure you’re using the appropriate oil for your engine type.
By following these steps, you can ensure your engine has the proper oil level, keeping your vehicle in excellent condition and saving yourself from unexpected repairs!
When Should You Check The Engine Oil Level?
Knowing the right time to check your engine oil level is critical to keeping your vehicle running smoothly. While checking your oil isn’t a daily task, regular monitoring can prevent engine problems and ensure your car stays in optimal condition. So, when exactly should you check your engine’s oil level? Let’s break it down:
1. Check Your Oil Once a Month
For most vehicles, checking the oil level once a month is sufficient. This regular habit ensures you catch any drops in oil levels before they lead to engine damage. Consistency is key, as even minor oil loss can accumulate over time, impacting your engine’s performance.
2. Before Long Road Trips
Planning a long journey? Always check your oil level before hitting the road. Long drives put extra strain on your engine, and having enough oil is crucial to handle the added workload. Running low on oil during a trip could leave you stranded or cause expensive damage.
3. After an Oil Change
It’s a good idea to check the oil level a day or two after getting an oil change. This helps ensure the new oil has settled correctly and the level is within the recommended range. Even professionals can sometimes make mistakes, so a quick check on your end provides peace of mind.
4. After Driving in Harsh Conditions
Certain driving conditions can accelerate oil consumption, making frequent checks necessary:
- Stop-and-Go Traffic: Prolonged idling and frequent stops can cause oil to degrade faster.
- Extreme Heat or Cold: Weather extremes can affect oil viscosity and performance.
- Heavy Towing or Hauling: If you’re towing a trailer or carrying heavy loads, your engine works harder, which may consume more oil.
5. Check in the Morning or When the Engine is Cool
For the most accurate results, check your oil level when the engine is cool, such as in the morning before starting your car. When the engine is warm, oil can expand and settle unevenly, leading to inaccurate readings.
6. After Warning Lights or Strange Symptoms
If your dashboard displays an oil pressure warning light or you hear unusual engine noises, check your oil level immediately. These signs could indicate dangerously low oil levels or other issues with your engine oil system.
7. During Seasonal Changes
Changes in seasons, especially transitions to extreme temperatures, can affect your oil. For example:
- In Winter: Cold weather thickens oil, which may require more frequent checks to ensure proper circulation.
- In Summer: Heat can cause oil to break down faster, requiring more frequent monitoring.
What If The Oil Needs Changing?
If your engine oil isn’t at the correct level, or if the oil appears dirty or degraded, it’s time to consider an oil change. But how can you tell?
Signs That an Oil Change is Necessary
- Dark or Dirty Oil: Fresh oil has a translucent amber color. If your oil appears dark or gritty when you check it, it’s time for a change.
- Burnt Oil Smell: A strong smell of burnt oil indicates overheating or deteriorating oil that can no longer perform its function effectively.
- Engine Warning Light: Many modern cars have oil pressure or maintenance warning lights that alert you to oil issues.
- Increased Engine Noise: If the engine becomes noisier or you hear knocking sounds, your oil might not be providing sufficient lubrication.
Steps to Change Your Engine Oil
- Prepare the Vehicle: Park on a flat surface and let the engine cool.
- Drain the Old Oil: Place a drain pan under the oil pan, remove the drain plug, and allow the old oil to flow out.
- Replace the Oil Filter: A clogged oil filter can reduce efficiency. Always replace it during an oil change.
- Add New Oil: Pour the correct type and amount of oil into the engine using a funnel.
- Check the Oil Level: After running the engine briefly, recheck the oil level to ensure accuracy.
Which Oil Goes In My Vehicle?
Choosing the right oil for your car is as important as checking its levels. Using the wrong type can lead to performance issues and damage.
Types of Engine Oil
- Conventional Oil: Ideal for older vehicles or low-mileage cars. It’s cost-effective but requires more frequent changes.
- Synthetic Oil: Offers better performance and longevity, especially in extreme temperatures.
- Synthetic Blend: A mix of synthetic and conventional oil, providing a balance of performance and affordability.
- High-Mileage Oil: Specially designed for vehicles with over 75,000 miles to reduce leaks and improve performance.
How to Choose the Right Oil
- Consult Your Owner’s Manual: This will specify the recommended oil type and viscosity for your vehicle.
- Consider Your Driving Conditions: If you drive in extreme temperatures or under heavy loads, synthetic oil may be the better choice.
- Check Industry Standards: Look for oils that meet API (American Petroleum Institute) or ACEA (European Automobile Manufacturers’ Association) standards.
Common Mistakes To Avoid While Checking Engine Oil
Even experienced car owners can make mistakes when checking their engine oil. Here are the most common ones to avoid:
1. Not Letting the Engine Cool
Checking oil immediately after turning off the engine can give inaccurate readings, as the oil hasn’t settled yet. Always wait at least 5-10 minutes.
2. Misreading the Dipstick
Dipsticks can be tricky to read, especially if the oil is clean. Wipe the dipstick clean and check the markings carefully.
3. Skipping Routine Checks
Waiting until the oil warning light comes on is a bad idea. By then, the damage may already be done. Make checking your oil a regular habit.
4. Adding Too Much Oil
Overfilling can cause frothing and damage to engine components. Always add oil gradually and recheck the level to avoid overfilling.
Frequently Asked Questions
1. How Often Should I Check My Engine Oil?
You should check your oil at least once a month and before long trips to ensure optimal performance.
2. What Happens If I Don’t Change My Oil?
Old or dirty oil can lead to engine wear, overheating, and eventual failure.
3. Can I Use Any Oil for My Vehicle?
No, always use the oil recommended in your owner’s manual. Using the wrong type can cause damage.
4. How Do I Dispose of Used Engine Oil?
Take used oil to a recycling center or an auto repair shop that offers oil disposal services.
5. Why Is My Oil Level Dropping So Fast?
This could indicate a leak, excessive consumption, or an underlying engine issue. Consult a professional for a thorough inspection.
Conclusion
Maintaining your engine oil levels is one of the simplest yet most important tasks for keeping your car running smoothly. By following the tips and guidelines outlined in this article, you can avoid costly repairs, improve your car’s performance, and extend its lifespan. So, when was the last time you checked your oil?


Add comment